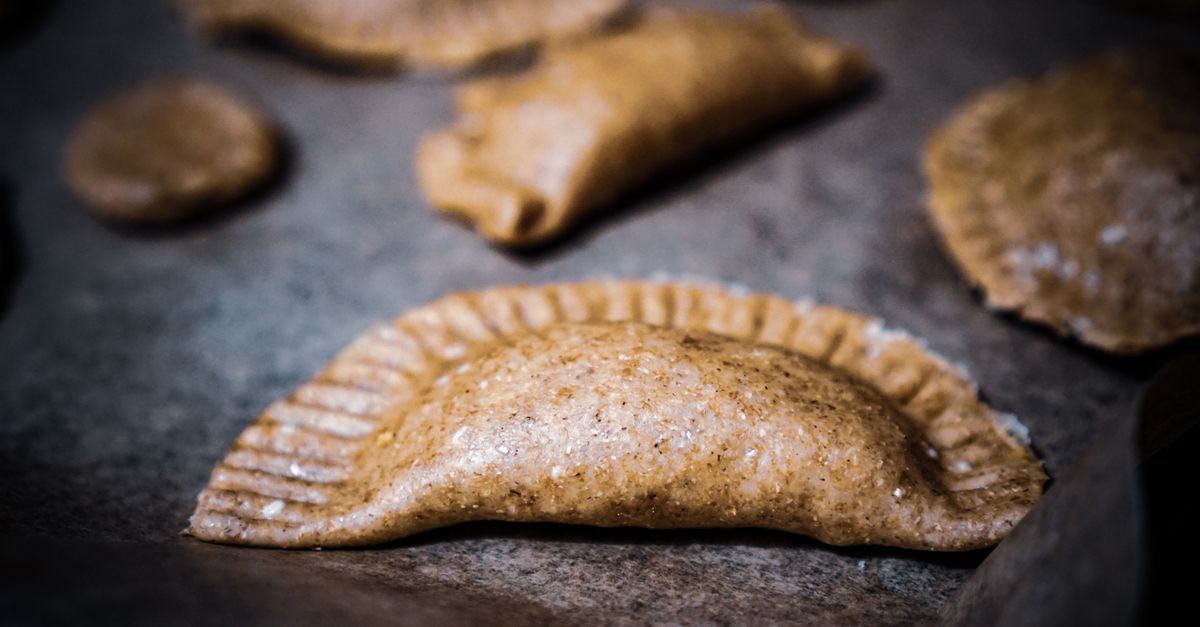
Why Your Homemade Dog Treats Fall Apart (And The Pro Secrets for Bakery-Quality Bites)
Every dog owner I know has, at some point, tried to bake homemade treats for their furry friend. It starts with the best intentions: control over ingredients, avoiding nasty additives, and that warm fuzzy feeling of providing something special. But for far too many, the dream quickly crumbles—literally. You pull a tray of what you hoped would be perfect little bone-shaped biscuits out of the oven, only for them to fall apart into a pile of sad, dusty pieces the moment you touch them. Or they turn out rock-hard, unappealing pucks. I’ve been there, more times than I care to admit. The disappointment is real, both for you and your bewildered pup.
I used to think my dog just had a knack for demolishing everything, but then I realized the problem wasn’t my dog’s chewing habits; it was my baking technique. After countless attempts, consultations with professional pet bakers, and more flour than I’d like to confess, I discovered the hidden secrets to making homemade dog treats that are not only healthy and delicious but also perfectly structured, holding up to storage, travel, and enthusiastic canine chomping. The good news? It’s not about complex recipes or exotic ingredients. It’s about understanding a few fundamental principles that most DIY recipes completely overlook.
Key Takeaways
- Ensure proper fat-to-dry ingredient ratios to prevent crumbling and create structure.
- Avoid excessive moisture, as it leads to soft, quick-to-spoil treats; aim for a firm, chewy texture.
- Use binding agents like eggs or flax ‘eggs’ to hold ingredients together effectively.
- Master baking temperatures and times to achieve a golden, firm exterior and a dry interior.
The Overlooked Power of Fat in Treat Structure (It’s Not Just for Flavor)
Most homemade dog treat recipes focus heavily on the ‘healthy’ aspects—oats, pumpkin, peanut butter—and often neglect the critical role of fat. In human baking, we understand fat provides tenderness, richness, and mouthfeel. In dog treats, it’s also a crucial structural component. Without enough fat, your treats will be dry, crumbly, and prone to disintegrating. Think of it as the glue that helps hold the dry ingredients together, giving the treat its integrity. The mistake I see most often is reducing or eliminating fat completely in an effort to make treats ‘healthier,’ which ironically makes them fall apart and often leads to more waste.
In my experience, a good starting point for a balanced dog treat is to ensure your fat source, whether it’s a healthy oil like coconut oil, a nut butter, or even a meat-based fat like rendered bacon grease (in moderation!), is adequately present. For every cup of dry ingredients (flour, oats, etc.), you generally want at least 2-3 tablespoons of a solid or semi-solid fat. For example, if you’re using pureed pumpkin, which adds moisture but very little fat, you absolutely need to compensate with a generous dollop of peanut butter (unsweetened, xylitol-free, of course) or a tablespoon of coconut oil. This doesn’t make the treats greasy; it makes them stable. The difference between a treat that holds its shape and one that turns to dust in your hand often comes down to this simple, often-missed fat balance. Don’t fear the fat; embrace its role in structure.
The Silent Killer: Too Much Moisture (And Why Drying is Key)
Another common culprit behind crumbling or too-soft dog treats is excessive moisture. Many homemade recipes rely heavily on wet ingredients like pureed pumpkin, applesauce, or yogurt, which are great for flavor and nutrients. However, if these aren’t balanced with enough dry ingredients or sufficiently dried out during baking, your treats will turn out soft, spongy, and prone to molding quickly. More importantly, soft treats lack the structural integrity to withstand handling and storage, leading to them falling apart.
The critical shift for me was understanding that dog treats, especially those meant for storage, aren’t like human cookies; they need to be drier. When a recipe calls for a cup of pumpkin puree, I immediately consider the overall consistency of the dough. It should be firm enough to roll out without sticking excessively, not a sticky, sloppy mess. If my dough feels too wet, I’ll add an extra tablespoon or two of flour until it reaches a workable consistency. Furthermore, the baking process itself needs to actively dry out the treats, not just cook them. This often means baking at a slightly lower temperature for a longer period, or even incorporating a post-bake drying phase. I’ve found that leaving the treats in a cooling oven for an additional hour or two after baking, with the heat off and the door slightly ajar, works wonders for achieving that perfect, firm, and durable texture. This ‘drying’ step is paramount for treats that truly last.
The Unsung Heroes: Proper Binding Agents (Beyond Just Flour)
Just like in human baking, binding agents are essential to hold everything together. While flour does some of this work, relying solely on it, especially with gluten-free alternatives, often isn’t enough. Many home bakers assume that if they just add enough flour, the treats will bind. However, if your treats are falling apart, it’s a clear signal that your binding game is weak. Eggs are the most common and effective binder, but for dogs with sensitivities or for vegan recipes, alternatives are readily available.
What changed everything for me was consistently using a dedicated binding agent beyond just flour. For example, if a recipe doesn’t call for eggs, I’ll often add one, especially if there are many loose ingredients like shredded carrots or oats. For those avoiding eggs, a ‘flax egg’ (1 tablespoon ground flaxseed meal mixed with 3 tablespoons water, allowed to sit for 5 minutes until gel-like) is an excellent substitute. Another powerful binder, especially in gluten-free recipes, is xanthan gum (just a quarter teaspoon per cup of flour can make a huge difference in texture and elasticity). Even a tablespoon of cornstarch or arrowroot powder can lend a hand. These binders create a more cohesive matrix within the dough, preventing the treats from fracturing under pressure. It’s about building a robust internal structure, not just a solid exterior.
The Goldilocks Zone: Baking Temperature and Time
Baking dog treats isn’t just about throwing them in the oven until they’re ‘done.’ The temperature and duration are critical for achieving the right texture and ensuring they hold together. Too high a temperature, and they’ll burn on the outside while remaining moist and soft internally, leading to eventual crumbling or spoilage. Too low, and they won’t dry out sufficiently.
The mistake I see most often is baking dog treats at the same temperature and time as human cookies (e.g., 350°F for 10-12 minutes). For most homemade dog treats, especially those that are thicker or contain a lot of moisture, a slightly lower temperature (like 325°F or 300°F) for a longer period (20-30 minutes, sometimes more) is ideal. This allows the treats to bake through and, crucially, to dry out. You’re aiming for a firm, hard texture, not a chewy or soft one, unless that’s specifically what the recipe intends (and even then, they need to be fully cooked and minimally moist for storage).
What truly changed my treat-making game was the two-stage baking process. First, bake them until they are lightly golden and firm to the touch. Then, turn off the oven and leave the treats inside for another 1-2 hours, or even overnight, with the oven door propped open slightly (a wooden spoon works perfectly). This low, slow drying period removes residual moisture, creating that durable, bakery-quality crispness and chewiness. This method is the secret weapon for treats that truly hold up and stay fresh longer.
Ignoring the Cooling and Storage Stage (Your Treats Aren’t Done Yet)
Even if you’ve mastered the ingredients, binding, and baking, your treats can still fall apart if not handled correctly post-oven. Many people are eager to get their treats off the baking sheet, often leading to breakage. Also, improper cooling and storage can introduce moisture, undoing all your hard work and leading to soft, crumbling treats or, worse, mold.
In my experience, patience is a virtue here. After the initial bake and optional oven-drying, transfer the treats to a wire cooling rack only when they are cool enough to handle without breaking. Let them cool completely, exposed to air, for several hours or even overnight. This final air-drying period is essential to ensure any last vestiges of moisture evaporate. Then, and only then, are they ready for storage. An airtight container is best, but avoid stacking them too densely if they’re still slightly warm, as this can trap moisture. If you live in a humid environment, consider adding a food-safe desiccant packet to the container (like those small silica gel packets found in food packaging) to absorb excess moisture, significantly extending their shelf life and maintaining their structural integrity. These final steps are often rushed, but they are just as important as the baking itself for perfect, lasting treats.
Frequently Asked Questions
Q: Why do my dog treats get moldy so fast, even after baking?
A: Mold is almost always an indication of too much moisture. Ensure your treats are thoroughly dried out during the baking process, perhaps by baking at a lower temperature for longer, or by using the post-bake drying method in a cooling oven with the door ajar. Also, make sure they are completely cool and dry before storing them in an airtight container. Humidity in your environment can also play a role; consider a food-safe desiccant in your storage container.
Q: Can I substitute different flours, like almond or coconut, for wheat flour?
A: Yes, but be aware that different flours have vastly different absorption rates and binding properties. Coconut flour, for example, is very absorbent, so you’ll need significantly less of it than wheat flour, and likely more liquid. Almond flour is less absorbent but also lacks gluten for structure. When substituting, start with a smaller amount of the new flour and adjust liquid as needed to reach a workable dough consistency. You may also need to add extra binders like an egg or flax egg, or a pinch of xanthan gum, to maintain structure.
Q: My treats are too hard, almost like rocks. How can I make them a bit softer but still firm?
A: Treats becoming rock-hard is a sign they might be over-baked or dried out too aggressively. Try reducing your baking time slightly, or increasing the baking temperature by 10-15°F for a shorter period. If you’re doing a post-bake drying, reduce the time you leave them in the cooling oven. The goal is firm, not brittle. Adding a bit more fat (like extra peanut butter or a dash of oil) or a slightly moister ingredient (like an extra tablespoon of pumpkin puree) can also result in a chewier, less dense texture.
Q: How long do homemade dog treats typically last?
A: If properly dried and stored in an airtight container, most homemade dog treats can last 2-3 weeks at room temperature. For longer storage, you can refrigerate them for up to 6-8 weeks or freeze them for up to 3-4 months. Always check for any signs of mold or staleness before giving them to your dog. Treats made with fresh meat or dairy will have a shorter shelf life and should be refrigerated.
Q: What’s the best way to cut dog treats into shapes without them breaking?
A: Use a sturdy cookie cutter and ensure your dough is chilled and firm. After rolling out the dough, place it in the refrigerator for 15-20 minutes before cutting. This makes the dough less sticky and more resistant to tearing or crumbling. When cutting, press firmly and twist slightly for a clean cut. Carefully transfer the cut shapes to your baking sheet using a thin spatula to prevent distortion.
Making homemade dog treats is a rewarding endeavor that deepens the bond with your pet and provides peace of mind about what they’re eating. It might take a few tries to hit that perfect balance, but by paying attention to these overlooked secrets—proper fat balance, moisture control, effective binding, precise baking, and careful post-bake handling—you’ll soon be turning out bakery-quality bites that your dog will adore, and that actually hold together. No more sad crumbs, just happy, tail-wagging approval. Happy baking!
Written by Emily Chen
Well-being & Relationships
A community advocate who understands the nuances of balancing personal goals with social connections and responsibilities.
You Might Also Like
Why Your Homemade Pizza Lacks That Perfect Crisp (And The Pro Secrets That Deliver Pizzeria-Quality Crunch Every Time)
Unlock the secrets to truly crispy homemade pizza crust. Stop soggy bottoms and learn what works for pizzeria-quality crunch.
Why Your Homemade Soup Is Bland (And The Flavor Secrets That Changed Everything For Me)
Discover the overlooked reasons your homemade soup lacks flavor and the simple, impactful techniques that transform it into a culinary masterpiece.
Why Your Homemade Pizza Isn't Crispy (And The Pro Secrets That Deliver Pizzeria-Quality Crunch Every Time)
Stop soggy pizza! Discover why homemade crusts lack crispness and learn the pro secrets for pizzeria-quality crunch every time.