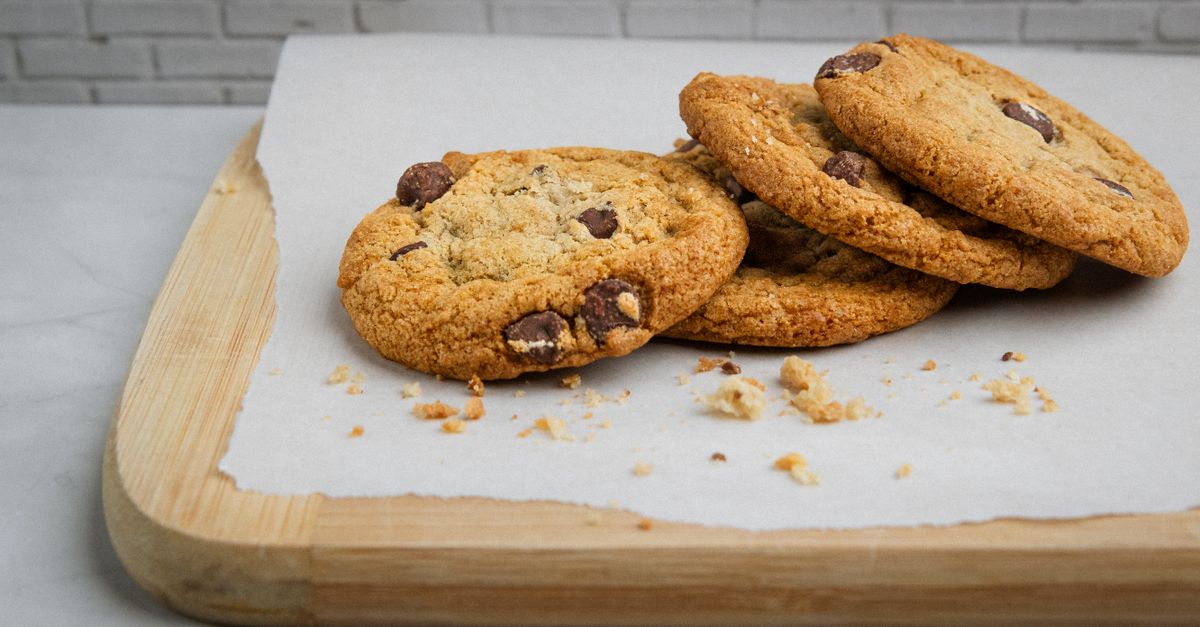
Why Your Homemade Cookies Are Hard (And The Simple Shifts That Guarantee Chewy Perfection Every Time)
Most people think baking cookies is a straightforward process: mix ingredients, drop on a tray, bake. Yet, time and again, I hear the same complaint: “My homemade cookies always turn out hard and crumbly, never that soft, chewy texture I crave.” I’ve been there. For years, my cookies were closer to biscottis than the tender, melt-in-your-mouth delights I envisioned. I’d follow recipes to the letter, only to pull a batch of brittle, uninspired discs from the oven. It was frustrating, leading me to believe that bakery-quality chewy cookies were some elusive art form reserved for professional pastry chefs.
The truth, I discovered, is that achieving that perfect chewy cookie isn’t about secret ingredients or arcane techniques. It’s about understanding a few fundamental, often overlooked, principles of baking chemistry and execution. The mistakes are usually subtle, but their impact on texture is profound. What changed everything for me wasn’t a new recipe, but a deeper appreciation for how ingredients interact and how small adjustments can lead to dramatically different results.
Key Takeaways
- Precise ingredient measurement, especially flour, prevents dry, hard cookies.
- Using brown sugar and melted butter contributes significantly to a chewier texture.
- Avoid overmixing the dough and chilling it before baking for better structure.
- Slightly underbaking and proper cooling are critical for maintaining softness.
The Silent Saboteur: Improper Ingredient Measurement (Especially Flour)
In my experience, the number one culprit behind hard cookies is simply using too much flour. Most home bakers, myself included for a long time, scoop flour directly from the bag with a measuring cup, leveling it off. While seemingly innocent, this method compacts the flour, adding significantly more to your dough than the recipe intends. A cup of flour scooped this way can easily weigh 20-30% more than a properly measured cup, leading to a drastically dry dough that bakes into a brick.
What changed everything for me was switching to a digital kitchen scale for dry ingredients. This isn’t just a pro-chef tip; it’s a fundamental shift for consistent home baking. Flour, sugar, and even butter are best measured by weight. If you don’t have a scale, at least spoon your flour into the measuring cup, then level it gently with a straight edge. Never pack it. This ensures you’re adding the correct ratio of dry to wet ingredients. Too much flour means less moisture available to create that tender crumb, resulting in a hard, dense cookie. I once weighed a ‘cup’ of flour using the scoop method and found it was 150 grams, when a properly measured cup should be around 120-125 grams. That extra 25-30 grams makes a huge difference in the final texture, drying out your dough before it even hits the oven.
The Sweet Secret: Balancing Sugar Types and Fat Temperature
Many cookie recipes rely heavily on granulated sugar, and while it’s essential for structure and crispness, an over-reliance can lead to a harder cookie. Granulated sugar contributes to spreading and a crispier edge, which is great in moderation. However, brown sugar is your best friend for chewiness. Its molasses content is not only a flavor enhancer but also a humectant, meaning it retains moisture, keeping your cookies softer for longer. The mistake I see most often is using only white sugar or an insufficient ratio of brown to white sugar. I’ve found that a 1:1 or even 2:1 ratio of brown sugar to granulated sugar, especially in chocolate chip or oatmeal cookies, delivers that signature chewy texture.
Another crucial factor is butter temperature. Most recipes call for softened butter, which creates air pockets when creamed with sugar, resulting in a cakier cookie. For ultimate chewiness, however, melted butter is often the unsung hero. Melted butter incorporates seamlessly into the sugars, leading to a denser, chewier cookie. This is because melted butter helps dissolve the sugar more completely, which discourages gluten formation and promotes a softer, more pliable dough. Try browning your butter slightly before adding it to your sugars for an extra nutty depth of flavor that complements the chewiness perfectly.
The Gentle Touch: Avoiding Overmixing and the Power of Chilling
When it comes to cookie dough, aggression is the enemy of chewiness. Overmixing the dough, especially after adding flour, develops the gluten too much. Gluten, a protein in flour, provides structure, but too much development leads to a tough, hard texture. Think of kneading bread versus gently folding cookie dough. You want just enough mixing to combine the ingredients; beyond that, you’re building a network of gluten that will make your cookies resiliently hard.
My recommendation is to mix the wet ingredients thoroughly, then add the dry ingredients and mix on low speed just until no streaks of flour remain. It’s better to have a few small flour patches than to overmix. What truly changed my cookie game, though, was the simple act of chilling the dough. This isn’t just about preventing spread; it’s about flavor development and texture transformation. Chilling allows the flour to fully hydrate, the fats to firm up, and the sugars to fully dissolve, leading to a more consistent, flavorful, and ultimately chewier cookie. I typically chill my dough for at least 30 minutes, but often for several hours or even overnight. This extra time allows the ingredients to meld, preventing excessive spreading and ensuring a thicker, chewier final product. It’s an extra step that makes a noticeable difference.
The Edge of Perfection: Strategic Baking and Cooling
Baking time is a narrow window when it comes to chewy cookies. The mistake I see most often is baking until the edges are deeply golden and the center looks completely set. This is a recipe for a hard, dry cookie. For chewiness, you want to pull your cookies from the oven when the edges are just set and lightly golden, but the centers still look slightly soft or even a little underdone. They will continue to bake and set on the hot baking sheet from residual heat, a process known as carryover cooking.
I typically reduce the recommended baking time by 1-2 minutes the first time I try a new recipe, then adjust from there. For example, if a recipe says 10-12 minutes, I’ll check at 8, then 9. A common sign of doneness for a chewy cookie is a slightly puffed center that may just begin to fall as it cools. Once out of the oven, immediately transfer the cookies to a wire rack. Leaving them on the hot baking sheet for too long can overbake the bottoms, making them tough. Proper cooling on a rack allows air circulation, preventing steam from building up and making them soggy, while still allowing them to cool gently and retain moisture. These subtle timing shifts are what elevate a good cookie to a truly great, chewy one.
Frequently Asked Questions
Q: Can I substitute all granulated sugar with brown sugar for max chewiness?
A: While brown sugar is great for chewiness, substituting all granulated sugar can drastically change the cookie’s structure, making it too soft, crumbly, and spread too much. Granulated sugar provides necessary crispness and helps the cookies hold their shape. A balance, often a 1:1 or 2:1 ratio of brown to granulated sugar, is usually best for optimal chewiness and structure.
Q: Why do my cookies spread too much if I use melted butter?
A: Melted butter can sometimes cause cookies to spread more if the dough isn’t properly chilled. When butter is melted, it’s less stable than solid, softened butter, leading to quicker spreading in the oven. Chilling the dough thoroughly (at least 30 minutes, preferably longer) allows the butter to re-solidify, giving the cookies a chance to set their structure before spreading excessively.
Q: Does adding an extra egg yolk help with chewiness?
A: Absolutely! Adding an extra egg yolk is one of my favorite tricks for an even chewier, richer cookie. Egg yolks are high in fat and protein, and low in water, which contributes to a more tender and dense crumb, enhancing that desired chewy texture without making the cookie dry.
Q: My cookies are hard the next day. How can I keep them soft?
A: Storing cookies properly is key. Once completely cooled, store chewy cookies in an airtight container. For an extra boost of moisture, I sometimes add half a slice of bread to the container. The bread will slowly dry out, and the cookies will absorb that moisture, staying softer for longer. Just remember to replace the bread every day or two.
Q: Is there a specific type of flour that’s best for chewy cookies?
A: All-purpose flour is generally suitable. However, using bread flour (which has higher protein) can sometimes lead to a tougher cookie due to increased gluten development. For most chewy cookie recipes, all-purpose flour works perfectly when measured correctly. Avoid low-protein cake flour, as it will result in a more delicate, crumbly texture rather than a chewy one.
Achieving that perfectly soft, chewy cookie is entirely within your reach. It’s a journey of understanding and small adjustments, not grand overhauls. By focusing on precise measurements, smart ingredient choices like brown sugar and melted butter, gentle mixing, and strategic baking, you can transform your homemade cookies from hard and crumbly to consistently tender and delicious. Experiment with these shifts in your next batch, and you’ll soon be enjoying bakery-quality chewiness that will make you wonder why you ever settled for anything less.
Written by Mark Jenkins
Practical Skills & Decision-Making
A veteran journalist known for his ability to research thoroughly and present information clearly and concisely.
You Might Also Like
Why Your Homemade Pizza Lacks That Perfect Crisp (And The Pro Secrets That Deliver Pizzeria-Quality Crunch Every Time)
Unlock the secrets to truly crispy homemade pizza crust. Stop soggy bottoms and learn what works for pizzeria-quality crunch.
Why Your Homemade Soup Is Bland (And The Flavor Secrets That Changed Everything For Me)
Discover the overlooked reasons your homemade soup lacks flavor and the simple, impactful techniques that transform it into a culinary masterpiece.
Why Your Homemade Pizza Isn't Crispy (And The Pro Secrets That Deliver Pizzeria-Quality Crunch Every Time)
Stop soggy pizza! Discover why homemade crusts lack crispness and learn the pro secrets for pizzeria-quality crunch every time.