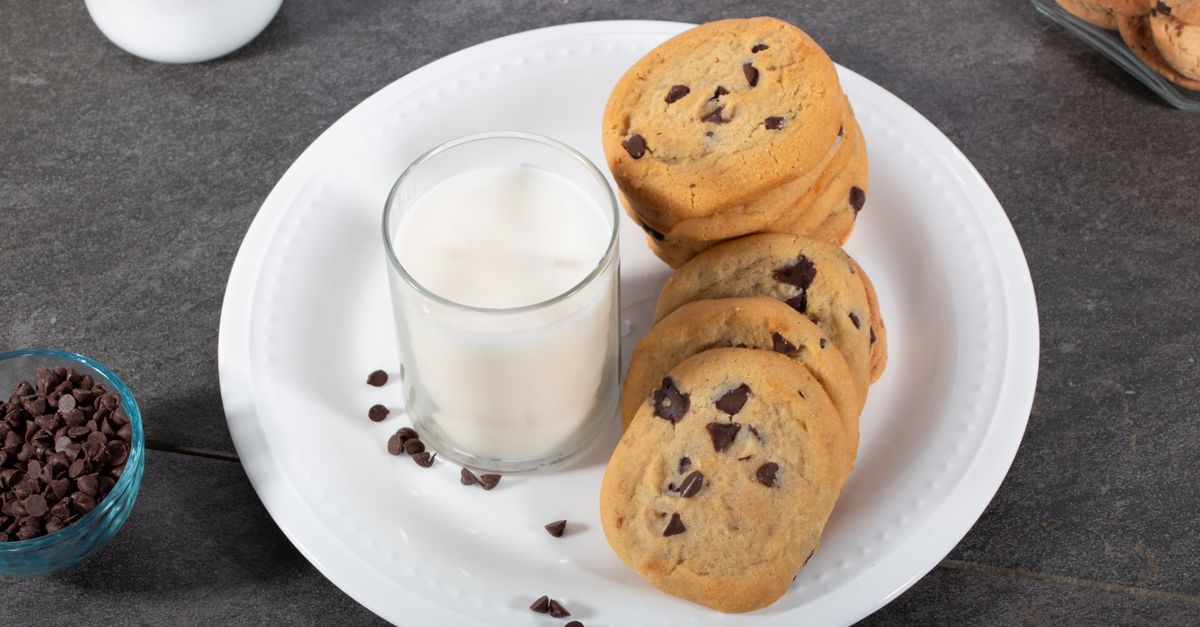
Why Your Homemade Cookies Are Flat (And The Simple Fixes That Guarantee Perfect, Puffy Results Every Time)
Are your homemade cookies consistently spreading into thin, sad discs instead of rising into those delightful, chewy mounds everyone craves? I’ve been there. For years, I struggled with this exact problem, producing trays of crispy-edged, flat cookies that lacked that satisfying soft center. It’s frustrating when you follow a recipe to the letter, yet the results just don’t match the pictures. You want that bakery-style chew, that slight rise, and that perfect texture contrast, not a uniform crisp. The good news is, achieving perfectly puffy cookies isn’t about some secret ingredient or complicated technique. It’s about understanding a few key scientific principles and making some simple, yet often overlooked, adjustments.
After countless batches, a fair share of failures, and a deep dive into the chemistry of baking, I cracked the code. What changed everything for me wasn’t a new recipe, but rather a few fundamental shifts in how I approached the process. These aren’t just generic tips; they’re the specific, actionable insights that transformed my baking from flat failures to consistently impressive, chewy successes. If you’re tired of seeing your cookies flatten out before your eyes, prepare to revolutionize your baking.
Key Takeaways
- Ensure your butter is truly cold, straight from the fridge and cut into pieces, for better structure and less spread.
- Properly measure your flour using the spoon and level method to avoid excess moisture that leads to spreading.
- Chill your cookie dough for at least 30 minutes to solidify fats and prevent premature melting in the oven.
- Consider adding a tablespoon of cornstarch to your dry ingredients for enhanced chewiness and reduced spread.
The Overlooked Power of Cold Butter (Not Just ‘Softened’)
Most cookie recipes call for “softened butter,” and this is where many home bakers unknowingly introduce their first error. When a recipe says softened, most people let butter sit on the counter until it’s room temperature and easily dented. The problem? If that butter is too soft, it has already started to melt, its emulsion destabilized. When this over-softened butter hits the heat of your oven, it melts almost instantly, releasing its water content too rapidly. This sudden burst of liquid causes your cookie dough to spread out before the flour and leavening agents have a chance to set its structure.
In my experience, the optimal butter temperature for chewy, puffy cookies is actually closer to cold butter than truly softened. Think straight-from-the-fridge firmness. I now cut my cold butter into 1-inch cubes and let it sit on the counter for only 10-15 minutes, or sometimes not at all, before creaming it. If your recipe is high in butter, like a classic chocolate chip cookie, having colder, firmer butter creates more air pockets when creamed with sugar. These air pockets expand in the oven, giving your cookies that desirable rise and chew rather than a flat, greasy spread. What changed everything for me was realizing that the conventional wisdom of ‘softened butter’ often translates to ‘too soft’ butter for preventing spread.
The Secret Ingredient Hiding in Plain Sight: Accurate Flour Measurement
This might sound obvious, but inaccurate flour measurement is a silent killer of cookie puffiness. Most home bakers (and I was certainly guilty of this for years) scoop flour directly from the bag with their measuring cup. This compresses the flour, adding anywhere from 20-30% more flour than the recipe intends. More flour means less moisture, leading to a denser, sometimes drier cookie, but surprisingly, it can also lead to spreading if the ratio of wet to dry ingredients is thrown off in an unexpected way.
The real culprit for spreading when flour is involved is often too little flour, not too much. If your flour is too light or you consistently under-measure it, your dough will be too wet. A dough that’s too wet lacks the structural integrity to hold its shape against the melting butter and expanding leavening agents. It simply collapses. The solution is the spoon and level method. Use a spoon to fluff up the flour in its container, then spoon it gently into your dry measuring cup until it’s overflowing. Finally, use a straight edge (like the back of a knife or a ruler) to level off the excess flour. This ensures you’re adding the correct amount of dry ingredients to balance your fats and liquids, giving your cookies the best chance to hold their shape and rise. When I started doing this, my cookies immediately had better body.
The Non-Negotiable Power of Chilling Your Dough
This is the step most people skip because of impatience, and it’s the single most impactful fix for flat cookies. When you mix your cookie dough, the friction of the mixer slightly warms the butter, even if you started with cold butter. Furthermore, the flour absorbs moisture, and the flavors meld. But the primary reason to chill your dough is to re-solidify the fats. Cold butter takes longer to melt in the hot oven. This extended melting time allows the edges of your cookies to set and the leavening agents to do their work (creating those airy pockets) before the entire cookie collapses into a puddle.
I used to think 15 minutes was enough. The mistake I see most often is rushing this step. What actually works is chilling your dough for a minimum of 30 minutes, but ideally 1-2 hours, or even overnight. For ultimate puffiness, especially with a high-butter recipe, I’ll even chill my dough for 24-48 hours. This prolonged chill not only prevents spreading but also deepens the flavor of the cookies. Once the fats are truly solid, the cookies spread slower, giving them height and a wonderfully chewy interior. This is a game-changer for uniform, consistently puffy results.
The Unsung Hero: A Pinch of Cornstarch for Structure and Chew
This is a tip I picked up from a seasoned baker and it’s a subtle but powerful one. Adding just a small amount of cornstarch to your dry ingredients can significantly impact the texture and prevent spreading. Cornstarch is a pure starch, and when combined with flour, it helps to create a softer, more tender crumb, while also absorbing excess moisture. This extra absorption means your dough is less prone to spreading out flat.
Specifically, for every cup of flour in your recipe, I recommend replacing about 1 tablespoon of flour with 1 tablespoon of cornstarch. So, if your recipe calls for 2 cups of flour, use 1 cup and 15 tablespoons of flour, and 1 tablespoon of cornstarch. What this does is two-fold: it tenderizes the gluten in the flour, resulting in a more ‘cakey’ or chewy texture rather than a crisp one, and it helps the cookie hold its shape against the heat. It’s a trick that reliably delivers that soft, thick, and chewy texture you’re after. This simple addition consistently gives my cookies that desired structure and chewiness, without altering the flavor profile.
Oven Temperature and Baking Sheet Strategy
Finally, don’t underestimate your oven and baking sheet. An oven that’s too low will exacerbate spreading because the cookies take longer to set. Ensure your oven is preheated to the correct temperature, and consider investing in an oven thermometer to verify its accuracy. Many ovens run hot or cold, throwing off baking times and cookie structure. For most drop cookies, 350-375°F (175-190°C) is a good range.
As for baking sheets, a light-colored, heavy-gauge aluminum baking sheet is your best friend. Darker sheets absorb more heat, leading to over-browning and rapid spreading on the bottom. Parchment paper or silicone baking mats are also crucial. They prevent sticking and provide an even surface, which further promotes even baking and prevents undue spreading. Never place cookie dough on a hot baking sheet; it will immediately begin to melt and spread before it even gets into the oven. Always use cool sheets, or let them cool completely between batches.
By implementing these five practical, precise adjustments – cold butter, accurate flour measurement, chilling the dough, a touch of cornstarch, and smart oven/baking sheet management – you’ll move past flat cookie failures. You’ll consistently produce perfectly puffed, delightfully chewy cookies that impress every time. Trust me, these aren’t just minor tweaks; they’re the foundational shifts that will elevate your baking game dramatically.
Frequently Asked Questions
Q: Why do my cookies always spread too much, even when I follow the recipe?
A: The most common culprits are butter that’s too soft, inaccurate flour measurement (often too little flour, leading to a wet dough), or not chilling your dough sufficiently. These issues cause the fat to melt too quickly, and the dough lacks the structure to hold its shape against the heat of the oven.
Q: Does the type of baking sheet really make a difference for cookie spread?
A: Absolutely. Dark-colored baking sheets absorb more heat and can cause the cookie edges to cook and spread faster, leading to thinner cookies. Light-colored, heavy-gauge aluminum sheets reflect heat, promoting more even baking and better shape retention. Always use parchment paper or a silicone mat for best results.
Q: Can I use shortening instead of butter to prevent cookies from spreading?
A: Yes, shortening has a higher melting point than butter and is 100% fat (butter is about 80% fat, 20% water). Using shortening can definitely reduce spread and produce a softer, more cake-like texture. However, it will also change the flavor profile as butter contributes significant taste. For best results, consider a 50/50 blend of cold butter and shortening.
Q: How long should I chill my cookie dough to prevent spreading?
A: While even 30 minutes can help, chilling your dough for 1-2 hours is ideal. For truly exceptional results, chill your dough for 24-48 hours. This allows the fats to solidify completely and the flour to fully hydrate, leading to a thicker, chewier cookie with less spread and a more developed flavor.
Q: My oven temperature seems accurate, but my cookies still flatten. What else could it be?
A: Beyond the factors mentioned, check your leavening agents. Old or expired baking soda or baking powder can lose their potency, failing to create enough lift. Also, ensure you’re not opening the oven door too frequently during baking, as sudden temperature drops can cause cookies to deflate and spread. Finally, make sure your dough balls aren’t too close together on the baking sheet, as this can impede even heat distribution and promote spreading.
Written by Emily Chen
Well-being & Relationships
A community advocate who understands the nuances of balancing personal goals with social connections and responsibilities.
You Might Also Like

Why Your Homemade Pizza Lacks That Perfect Crisp (And The Pro Secrets That Deliver Pizzeria-Quality Crunch Every Time)
Unlock the secrets to truly crispy homemade pizza crust. Stop soggy bottoms and learn what works for pizzeria-quality crunch.

Why Your Homemade Soup Is Bland (And The Flavor Secrets That Changed Everything For Me)
Discover the overlooked reasons your homemade soup lacks flavor and the simple, impactful techniques that transform it into a culinary masterpiece.

Why Your Homemade Pizza Isn't Crispy (And The Pro Secrets That Deliver Pizzeria-Quality Crunch Every Time)
Stop soggy pizza! Discover why homemade crusts lack crispness and learn the pro secrets for pizzeria-quality crunch every time.