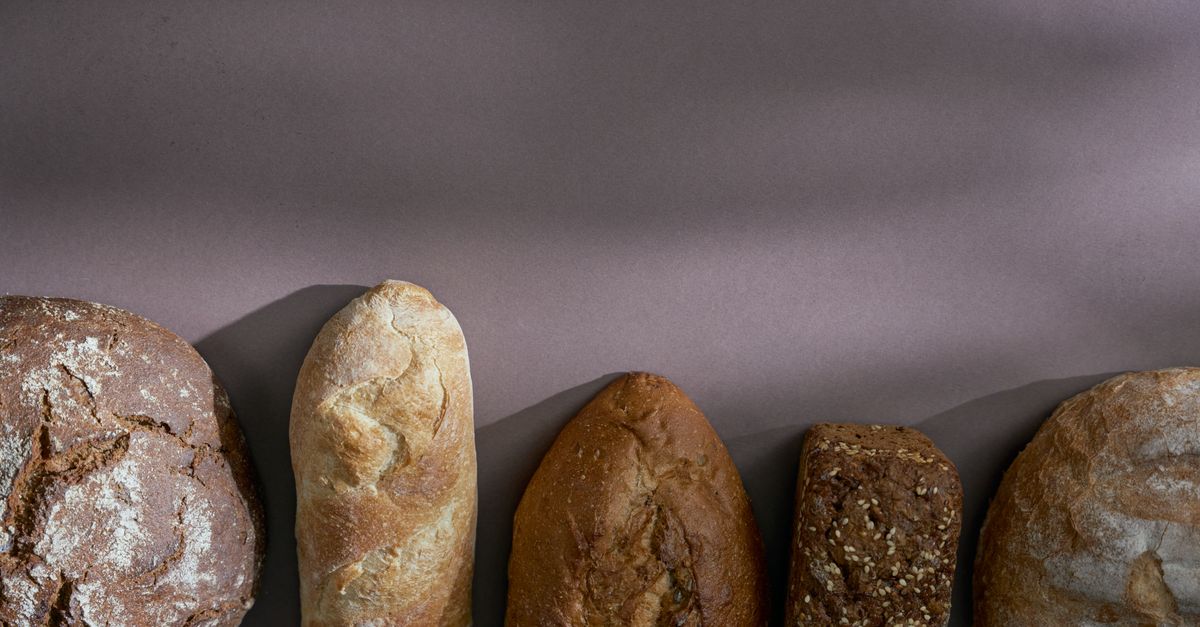
Why Your Homemade Bread Isn't Crusty (And The Pro-Secrets That Deliver Bakery-Quality Crunch Every Time)
When I first started baking bread, I had one obsession: that perfect, shatteringly crisp crust. You know the kind – the one that crackles when you slice into it, giving way to a soft, airy interior. My early attempts? Flabby, soft, and utterly disappointing. I’d follow recipes to the letter, spend hours kneading, proofing, and baking, only to pull out a loaf that felt more like a fluffy pillow than a rustic boule.
I tried everything: different flours, various rise times, even praying to the bread gods. Nothing seemed to consistently deliver that elusive crunch. It felt like a secret held tightly by professional bakers, a magic touch I just couldn’t replicate in my home kitchen. The mistake I see most often, and one I made for far too long, is focusing solely on the ingredients and basic steps, ignoring the crucial environmental factors and final baking techniques that transform a good loaf into a great one.
What changed everything for me was diving deep into the science of crust formation and adopting a few ‘pro’ techniques that are surprisingly simple to implement. It wasn’t about a fancy new ingredient or a complex kneading method; it was about controlling moisture and heat during the bake. Once I understood that, my bread game leveled up significantly. My loaves went from ‘meh’ to ‘wow,’ with a crust so good my friends thought I’d bought them from an artisan bakery.
Key Takeaways
- High initial steam is crucial for delaying crust formation, allowing the bread to expand fully before the crust hardens.
- Gradually reducing oven temperature after the initial steam phase ensures a deep, golden color and a thick, crisp crust.
- Baking on a preheated surface like a baking steel or stone provides an intense burst of heat for maximum oven spring and crust development.
- Proper cooling on a wire rack is essential for preventing steam buildup that can soften a perfectly baked crust.
The Steam Secret: Why Most Home Bakers Miss the Crucial First 10 Minutes
The single biggest factor in achieving a truly crusty loaf is steam, especially in the first 10-15 minutes of baking. Think of it like this: when you put bread into a hot oven, the yeast gets a final burst of activity, causing the dough to expand rapidly. This is called ‘oven spring.’ If the crust forms too quickly, it hardens and restricts this expansion, leading to a denser loaf and a thinner, less chewy crust. Steam keeps the surface of the dough moist and flexible, delaying crust formation and allowing the bread to puff up beautifully.
In a professional bakery, ovens are equipped with steam injection systems. At home, you have to get creative. My most effective method is using a Dutch oven or a covered roasting pan. By preheating a heavy-bottomed Dutch oven (cast iron is ideal) to a very high temperature (usually 475-500°F or 245-260°C) and then baking the dough inside with the lid on for the first part of the bake, you trap all the moisture released by the dough, creating a super-steamy environment. After 20-30 minutes, you remove the lid, and the bread is ready for the intense dry heat to crisp up and brown.
If you don’t have a Dutch oven, you can create steam by placing a tray of hot water in the bottom of your oven or by spraying the oven walls with water (be cautious, as this can damage some ovens). However, in my experience, the Dutch oven method is far superior and safer for consistent results. Without sufficient steam, your bread’s crust will set too early, leading to a dull, thin crust and potentially limiting your oven spring, regardless of how good your dough is.
The Temperature Drop: Browning and Crispness Beyond the Steam
Once the initial steamed phase is over, and your bread has achieved maximum oven spring, it’s time to transition to a dry heat environment to develop that deep, golden-brown color and ultimate crispness. This typically involves removing the lid of your Dutch oven (or removing your water tray/stopping your sprays) and often reducing the oven temperature.
When I first started, I’d keep the oven blazing hot, thinking hotter meant crispier. Big mistake. Too high a temperature after the steam phase can lead to a crust that browns too quickly, possibly even burns, before the interior is fully cooked, or it develops a brittle, unappealing texture. The key is a slightly lower, consistent heat for the remainder of the bake. For example, if I start at 475°F (245°C) for the initial 20 minutes with steam, I’ll then drop the temperature to 425°F (220°C) for another 20-30 minutes, or until the bread reaches a deep golden brown and sounds hollow when tapped on the bottom.
This controlled temperature drop allows the crust to develop a thicker, more robust texture without scorching. It also ensures the interior cooks evenly, resulting in that perfect contrast between a crunchy exterior and a soft, chewy crumb. I’ve found this two-stage temperature approach to be consistently effective in delivering that professional-looking and tasting crust.
The Hot Surface Secret: The Power of a Baking Steel or Stone
Beyond just oven temperature, the surface your bread bakes on makes an enormous difference. For years, I baked on a regular sheet pan, and while it worked, the bottom crust was always softer and less developed than the top. The problem? A thin baking sheet can’t hold or transfer heat as effectively as a thicker, denser surface.
Enter the baking steel or baking stone. These heavy, thermal-mass items are game-changers. By preheating a baking steel or stone in your oven for at least 30-60 minutes (or even longer for very thick steels) at your highest oven temperature, you create an intensely hot surface that mimics a professional brick oven. When your dough hits that superheated surface, it gets an immediate, powerful burst of heat from the bottom up. This rapid heat transfer contributes significantly to oven spring and, critically, ensures that the bottom of your loaf develops just as crisp and browned a crust as the top.
I exclusively use a baking steel now, and the difference is night and day. My bread springs higher, browns more evenly, and boasts a much crunchier bottom crust. If you’re serious about your bread’s crust, investing in one of these is one of the most impactful upgrades you can make to your home baking setup. It’s truly like giving your bread a turbo boost of heat.
The Post-Bake Ritual: The Cooling Conundrum Most People Overlook
You’ve done it! Your bread is out of the oven, golden brown, and radiating warmth. But the work isn’t quite done. The post-bake cooling phase is just as critical for a perfectly crisp crust, and it’s where many home bakers inadvertently sabotage their efforts. The biggest mistake? Allowing the bread to cool on a solid surface or, worse, slicing into it too soon.
When bread comes out of the oven, it’s still full of residual heat and steam. If you place it directly on a counter or a solid board, the bottom of the loaf will trap this steam, causing it to condense and soften the crust you worked so hard to achieve. This leads to a soggy bottom and a less satisfying overall texture.
Always, always transfer your freshly baked bread to a wire cooling rack immediately after removing it from the oven. This allows air to circulate all around the loaf, letting excess steam escape evenly. Furthermore, resist the urge to slice into your bread while it’s still hot. I know, the aroma is intoxicating! But the internal structure is still setting, and slicing too early can lead to a gummy texture and, yes, a softer crust as the steam escapes unevenly.
I typically let my larger loaves cool for at least 1-2 hours, sometimes longer, before cutting into them. For smaller rolls, 30-45 minutes might suffice. This patience is rewarded with a superior crumb and, most importantly for our crusty mission, a perfectly crisp exterior that lasts.
Frequently Asked Questions
Q: My bread crust is hard, but not crisp. What’s wrong?
A: A hard, chewy crust often indicates that your crust formed too early, restricting oven spring, or that the bread dried out too much during baking without proper steam. Ensure you’re providing sufficient steam during the initial bake to keep the crust pliable, allowing for maximum expansion and a lighter, crispier texture when it finally sets.
Q: Can I use ice cubes for steam instead of a water tray?
A: Yes, some bakers advocate for tossing a handful of ice cubes into a hot pan at the bottom of the oven just as you load the bread. The sudden melting creates a burst of steam. However, be extremely cautious with this method as the sudden temperature change can crack ceramic bakeware, and the steam can quickly dissipate. The Dutch oven method is generally more controlled and effective.
Q: Why does my bread go soft quickly after baking?
A: This is often due to cooling on a solid surface, trapping steam, or insufficient baking time to thoroughly dry out the crust. Always cool on a wire rack to allow air circulation. Additionally, ensure your bread reaches a deep golden-brown color and has an internal temperature of around 200-210°F (93-99°C) for optimal crust development and interior doneness.
Q: Does scoring (slashing) my bread help with crust formation?
A: Yes, scoring is crucial! It provides a controlled weak point for the bread to expand during oven spring, preventing uncontrolled cracks and tears. This controlled expansion contributes to a better internal structure and allows the steam to escape in a more organized way, which can positively influence crust texture. Aim for a confident, quick slash with a very sharp blade (a bread lame is ideal).
Q: How does different flour affect crust crispness?
A: Flours with higher protein content, like bread flour, generally produce a chewier crumb and can contribute to a more robust crust due to the stronger gluten network. However, the techniques for steam, temperature, and cooling are far more critical for crust development than the type of flour alone. Even with all-purpose flour, you can achieve a wonderfully crisp crust with the right approach.
Conclusion
Achieving that perfect, crackling crust on your homemade bread isn’t about magic; it’s about understanding and controlling the interplay of moisture and heat. By implementing these key ‘pro’ techniques – ensuring ample initial steam, managing your oven temperature with a gradual drop, utilizing a preheated baking surface, and employing a proper cooling ritual – you’ll transform your loaves from good to genuinely outstanding. Stop settling for soft bread and start baking the kind of crusty, artisanal masterpieces you’ve always dreamed of. Your taste buds (and your ears!) will thank you.
Written by Mark Jenkins
Practical Skills & Decision-Making
A veteran journalist known for his ability to research thoroughly and present information clearly and concisely.
You Might Also Like
Why Your Homemade Pizza Lacks That Perfect Crisp (And The Pro Secrets That Deliver Pizzeria-Quality Crunch Every Time)
Unlock the secrets to truly crispy homemade pizza crust. Stop soggy bottoms and learn what works for pizzeria-quality crunch.
Why Your Homemade Soup Is Bland (And The Flavor Secrets That Changed Everything For Me)
Discover the overlooked reasons your homemade soup lacks flavor and the simple, impactful techniques that transform it into a culinary masterpiece.
Why Your Homemade Pizza Isn't Crispy (And The Pro Secrets That Deliver Pizzeria-Quality Crunch Every Time)
Stop soggy pizza! Discover why homemade crusts lack crispness and learn the pro secrets for pizzeria-quality crunch every time.